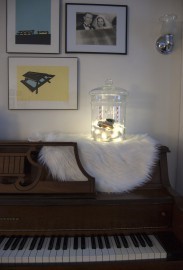
If you’ve ever wanted to climb into a snow globe, this project is for you. The great thing about this is that you can customize it for your family or a person (or family) you’ll be giving it to. Add whatever you think would be best for decoration and top it off with a banner that spells out your family name. You can create it with one holiday in mind or swap out the Christmas tree for a snowman or sled so it’s relevant for the whole season.
Supplies…most from your local Goodwill Store:
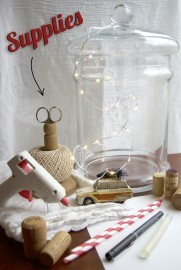
- Large piece of glassware
- White cloth for snow or even a wool knitted scarf
- Filler to go under the fabric (I used corks)
- 1 piece of cardstock
- LED string lights (Make sure they don’t produce much heat—since they’ll be touching fabric you need to be careful not to create a fire hazard.)
- Twine or yarn
- Scissors
- Hot glue
- Hot glue gun
- Pen
- Pencil
- 2 paper straws
- Small ornaments (Scout the knick-knack and holiday sections of your Goodwill. Keep a lookout for trees, deer, and outdoor activities.)
- You could also add birch branches or pinecones foraged from outside!

Step 1:
Snip a slice about an inch long into both of your straws. Measure a piece of twine out that is a little bit longer than what you need to spell out the name of the person (or family) you’re making the gift for. Knot it on both ends. Slip the knot into each straw and slide the twine down to the bottom of the cut sections.
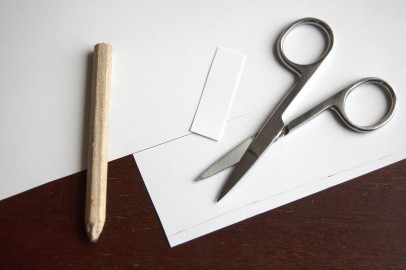
Step 2: Cut the paper for your banner. You’ll need one piece for each letter of the name. My paper rectangles were each about 1 ½ inches x ½ inch. Before I cut them all out I drew a long line in pencil near the bottom of the area in which I was cutting. This creates a guide so you cut into the pennants out about even.

Step 3: Fold each rectangle in half then cut a V shape through both layers using the pencil line as a guide for the V’s height. When you’re done with that, erase the pencil or just write your letters on the opposite side.
Step 4: Fold each letter around the twine so you can get the spacing correct. When it looks right to you, add a dab of hot glue inside the paper right where it rests on the twine. Quickly pinch it closed.

Step 5: Dab a dot of glue to the bottom of one straw and stick it to the bottom inside the jar. You’ll want to place it right up against the wall so you have more space to decorate in front of it. Do the same to glue the second straw in place.
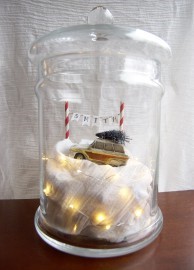
Step 6: Now add the snow! You could use traditional fake snow, but the idea of fabric is much better for a lot of reasons. The texture is much more fun, you can easy drape it over twinkle lights, and with corks supporting it, the snow will be firmer and easier to rest heavy ornaments on top of. To get the snow arranged just right, flip the lid of the jar over (you could also use a bowl) and drape the cloth over it. Take one string of LED lights, turn it on, and spread it out on top of the fabric making sure that the on/off switch was hanging out. Then begin to pile in the corks wrapping the rest of the lights around the outside of them.
Step 7: Fold the fabric on top of the cork into a bundle, but keep the light switch accessible outside of the bundle. Turn the whole thing over and carefully nestle it into your jar placing the light switch in the back right under the banner so you can easily find it.
Step 8: Turn on your second light string and place the control switch with the first one. Reach down into the jar to wrap the rest of the string lights around your snowy hill. Shift the corks into place as necessary to get a look you like. When everything is set, decide where you’ll add your ornaments. When the placement looks good, dab a little hot glue where you need to and stick everything in place!